Linking My Disney Experience Accounts
Ready to embark on your Disney vacation? Before you dive into the world of Disney, let’s get your group set up by linking My Disney Experience accounts. Trust me, it’s going to make your trip a whole lot smoother!
Hey there, fellow Disney vacationers! Before diving into our easy-peasy guide on linking My Disney Experience accounts, here are a few handy things you might wanna know. Ready? Let’s go!
Why Link Accounts?
It’s super important to link each family member’s or group member’s My Disney Experience account before you start making those exciting Disney reservations. Here’s why:
- Easily make group reservations for dining, parks, and virtual queues.
- Access cool Disney services like Genie+, Lightning Lanes, and PhotoPass (just remember, additional fees apply).
- Everyone in your travel party will be able to see these items in their My Disney Experience Account
Let’s Get Started!
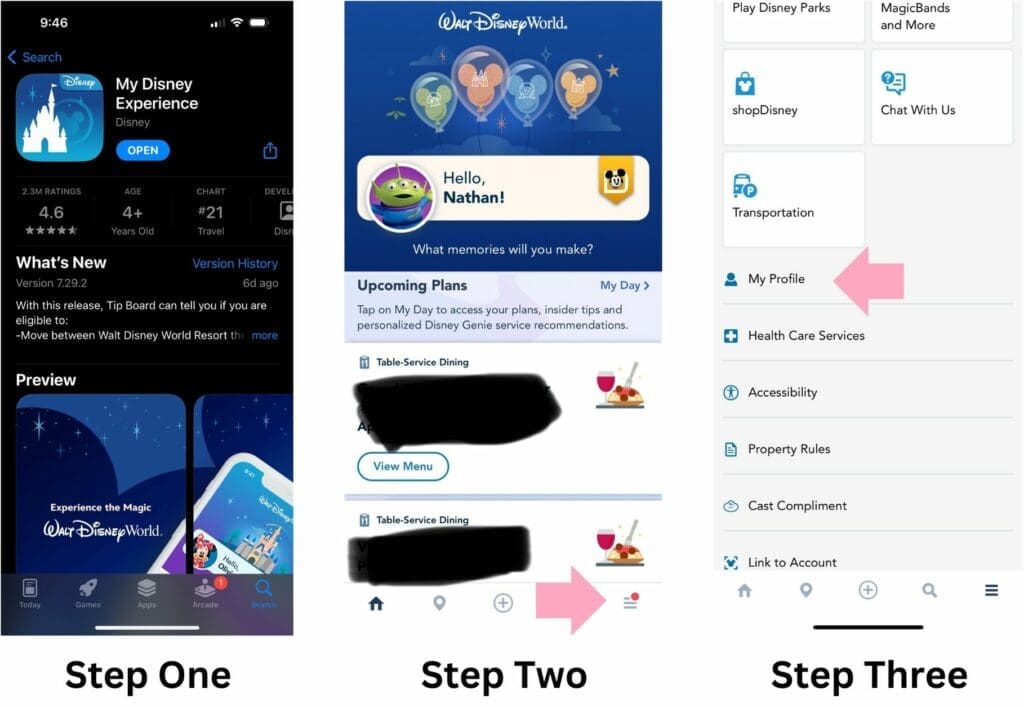
STEP 1: First things first, each family member should download the My Disney Experience App on their mobile device.
STEP 2: Open the app and spot those 3 lines? Yep, click on them!
STEP 3: Scroll down a bit until you see “My Profile”. Give that a click!
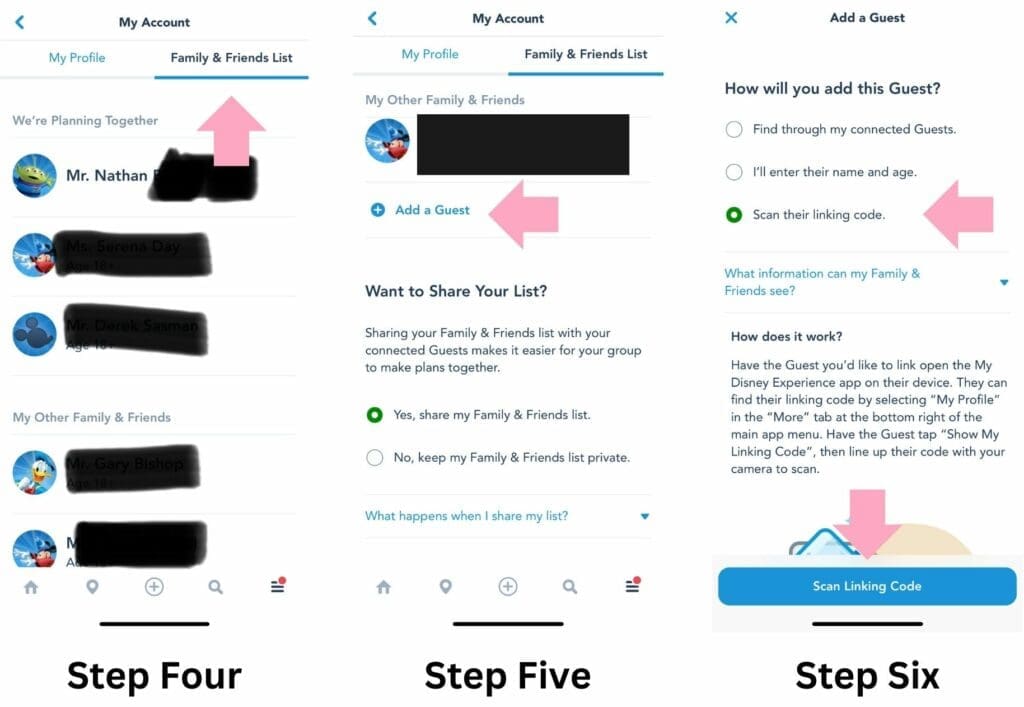
STEP 4: Now, click on “Family & Friends List”.
STEP 5: Ready to add someone? Click “Add a Guest”.
STEP 6: Choose “Scan their linking code” and then click “Scan Linking Code” at the bottom.
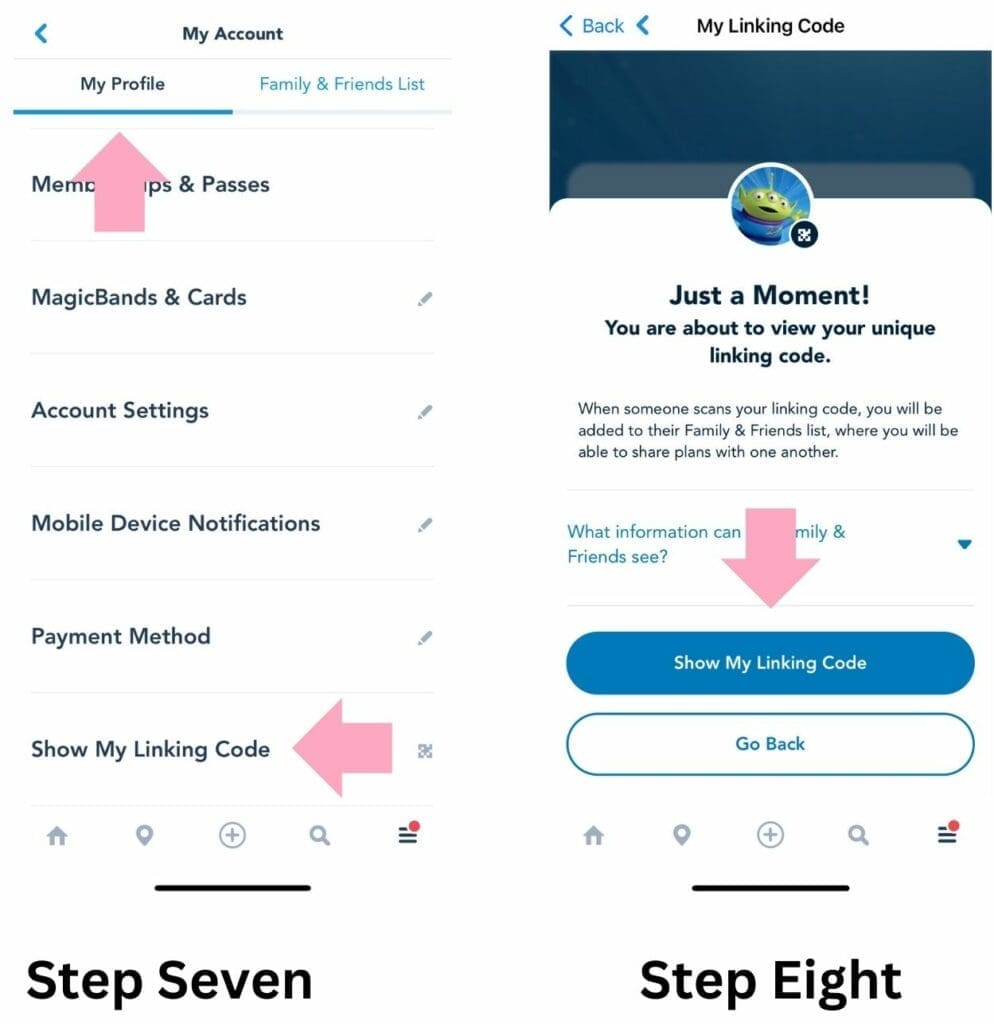
STEP 7: Get the other family/group member(s) to follow steps 2 and 3. Then, they should click “Scan Linking Code” at the bottom.
STEP 8: Click “Show My Linking Code” and scan the code with the first person’s device. And voila! Success!
Not in the Same Place? Now Worries
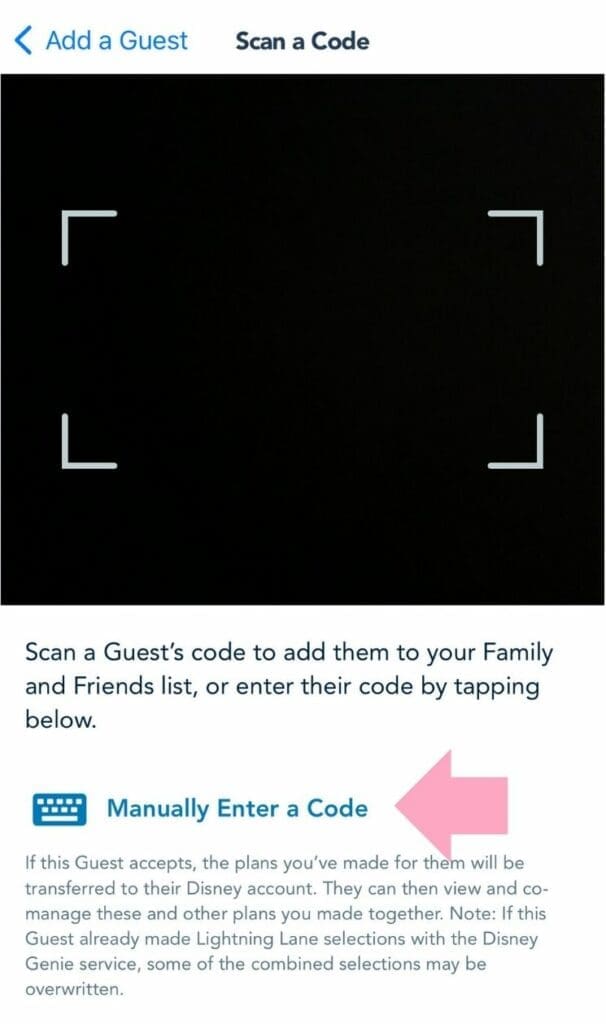
- If your Disney travel party isn’t right next to you, don’t fret! You can still link accounts manually. Just follow the steps above, but when you get to the scanning part, click “Manually Enter Code”. Have your friend send you their code, and remember, it’s only good for 30 minutes, so you’ll want to make sure everyone is ready!
I hope this step-by-step guide to linking My Disney Experience accounts was a breeze for you. You’re now ready to dive into some magic! Enjoy your vacation and have a blast in the parks!
Looking To Book Your Dream Disney Vacation?

Meet the Author: Nate Bishop
I’m a die-hard Disney fan with 38 years of visits under my belt, having stepped into Disney World 120+ times. Proud to be a Disney Annual Passholder, a Vacation Club member since ’92, a Castaway Club Member, and a runDisney enthusiast. Oh, and I’ve graduated from the Disney College of Knowledge. Need Disney insights or planning tips? I’m your guy!
LAST UPDATED: